|
|
|
Servant Designs
PhotoImpact Tutorial for
Inside/Outside Frame
(Based on Joy's Inside-Outside Tutorial)
I probably did this the hard way, but it got the results I wanted. This is my first attempt at a tutorial so I hope it is helpful to everyone who tries it. I used a photo that I took in our flower garden last summer of one of our many daylilies. You can use any photo or picture that you like and get some very interesting results. |
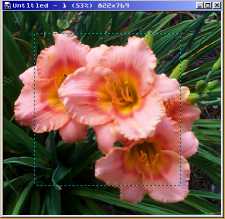
Open the graphic you want to frame and make a selection a bit smaller so that the picture will overlap the frame in places. Copy the selection and paste as a new image. Merge. |
|
|
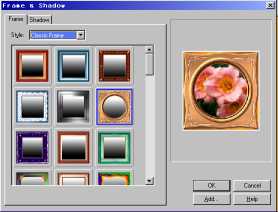
Using the frame designer, choose a frame. I used one with a round center. If you are proficient with PI, you could make a frame of your choice using the path drawing tool. |
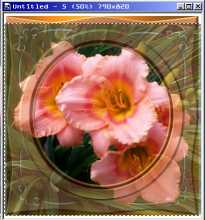
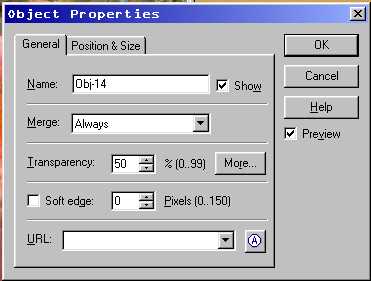
Copy the original graphic and paste into the framed picture. Right click on the new layer, choose properties and set the transparency to 50%. |
 |
|
Position the top layer over the bottom layer until the images line up properly. |
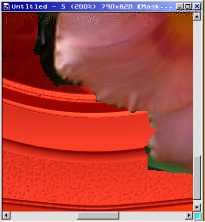
Click the mask mode button at the bottom left of the screen. Your image should have a red tint now. |
|
|
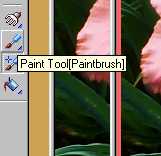
Choose the Paint Tool and use these settings.
|
| Using the Paint Tool, paint out all areas of the top layer that you do not want to show on the frame. |
|
|
Once you have most of it done, you will probably want to reduce the brush size and paint carefully around the edges of the parts of the graphic you want to overlap the frame. Zooming in also helps when painting around the edges. |
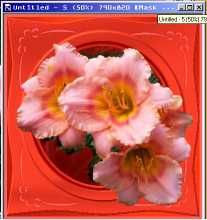
| Be sure to paint in all areas of frame that you don't want covered by your
graphic. Areas that will show inside the frame do not have to be painted but it doesn't
matter if you do. The bottom layer will show regardless. Turn off the mask mode. Right click on the top layer and reset transparency level to 0%. Right click and merge. |
|
|
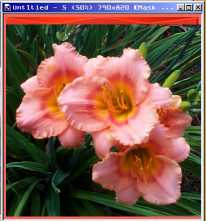
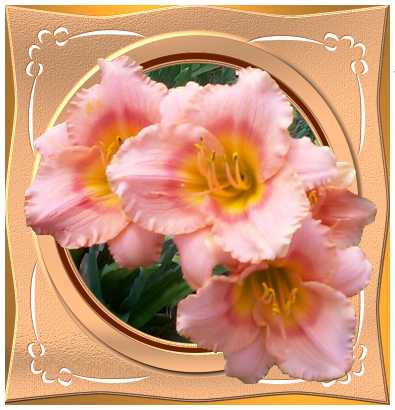
Make any changes you like such as dimension changes, etc. and save your finished work. |