 |
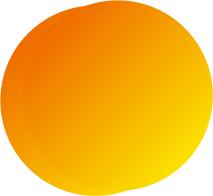
Using path drawing tool, create a 2d circle with diagonal gradient
in a rusty orange and a dark golden yellow. Duplicate circle and place over first circle
to the right approximately 10% and up just a bit. |
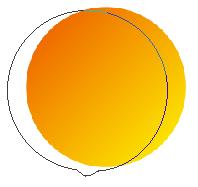 |
Edit bottom circle by adding a point on either side of the bottom
point. Pull the original point out just a little and adjust it with the handles to make a
small bump on the peach. |
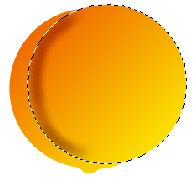 |
Convert top circle from a path to an image under the object menu.
Keeping this circle selected, use the burn tool to darken the left edge that is inside the
bottom circle. Merge as a single object. |
 |
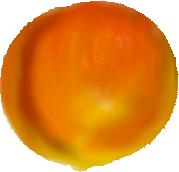
Add a little of the rusty orange along the upper right edge with
the oil paint brush. Add a small area of white in the center of the left side with the oil
paint brush. |
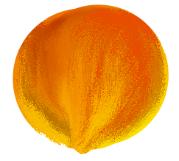 |
Use the bristle smear to pull some of the rusty orange to the
center of the peach to blend in with the yellow and white being sure to leave some
highlights along the right and left edge of the peach and in the center. |
 |
Use the smudge and blur tools to continue blending until you have
the look you want. If you need to, add a little more color in places you may have
overblended. You may also need to burn the crease a bit more to accent it. |