|
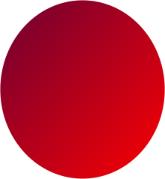
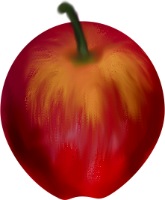
Using path tool create a 2d ellipse using a diagonal gradient with
very dark red and bright red for the colors. |
 
|
Edit the path by adding a point on the bottom on each side of the
center point. Adjust them to make it look like the pointy bottom of a red delicious apple
or flatter like a Rome or other rounder apple. Convert object type from path to image. |
|
|
|
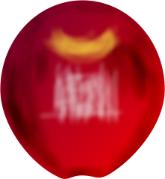
Burn the left edge of the apple heavily and more lightly at other
edges. Burn lightly in a few places to give it dimension. Airbrush with white at the
center and with a dark yellow or gold in an elongated u toward the top. Transparency and
soft edge settings should both be approximately 50%. |
|
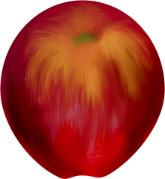
Using the bristle smear, work the yellow and white into the apple
in a halo toward all directions to achieve the look of an indentation for the stem. Blend
some with the smudge and blur tools. Paint in a small oval with apple green in the center
of the halo then blur to blend. |
|
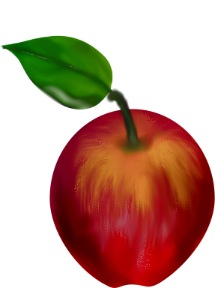
Use the basic brush with a dark green. Set brush panel to multi
colors and set mode to paint as object. Use a brush width appropriately sized to make a
stem for your apple. Paint on edges with black then smudge to shade. Select both shapes
and merge as a single object. Add a leaf if you like. My leaf was made with custom shape 1
with the magic turnpage effect to give the edge a rolled look. Then it was shaded in a
similar fashion to the methods used in all the fruit. |